
How etching and carving on glass is done.
First what is the difference between etching and carving? Any glass that is sandblasted would be would be considered etched glass, but for our purposes we distinguish it the following way. Surface blasting going less than 1/6" is what we consider etched, deeper we consider carving. There are visible differences between the two. Etched glass will have thin lines that are left clear or not sandblasted to bring out the design where carved glass uses a more three dimensional approach. In glass carving you carve areas to different depths allowing the entire panel to be carved and still have distinct design lines.
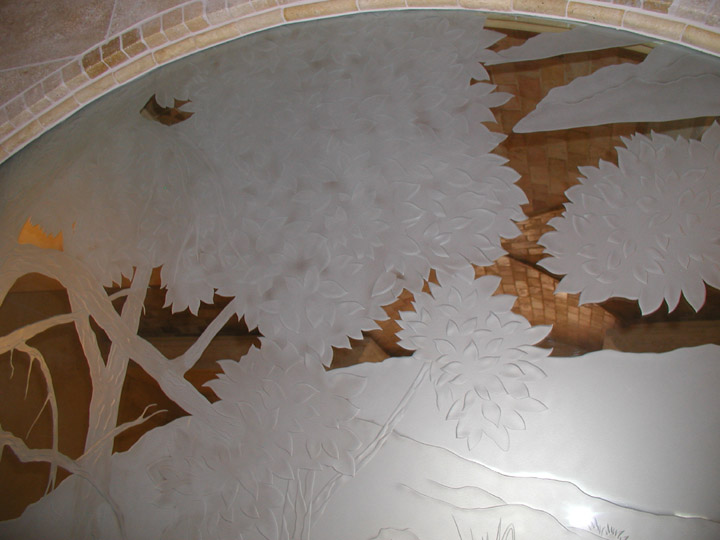
Here are pictures of an "etched" piece of glass and a "carved piece of glass (in this case mirror).
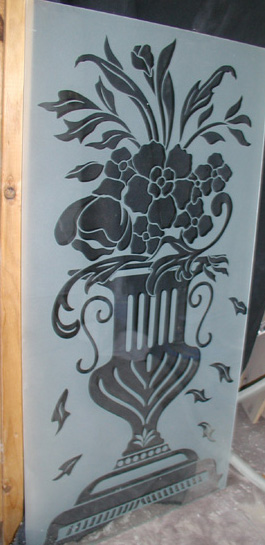
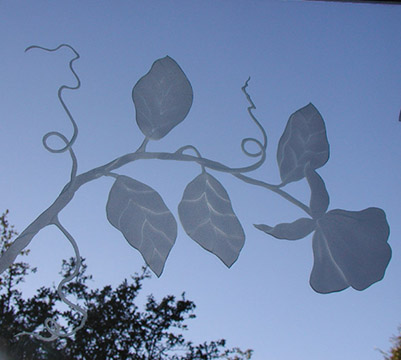
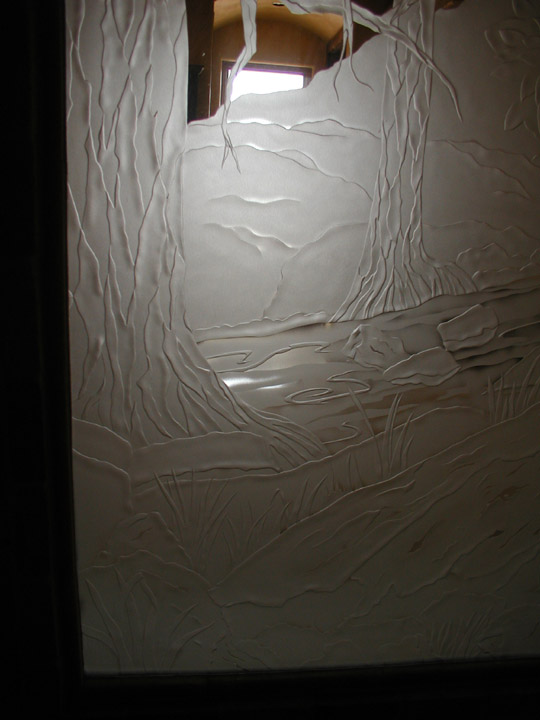
In the first picture you can see that there is little dimension and the design is shown with distinct areas that are left clear almost like a line drawing. Dimension in an etched piece is shown by the clear areas or by shading from a full etched area to a partially etched area. In the second picture you can see that while there is still negative space around the carved design the design itself has none. In this case it was done by carving approximately 1/8" deep into the glass on one side of a line and only surface etching on the other side. This creates a more three dimensional look because the lines are encompassed in etching and not just clear space.
Below are some picture of the carving process.
First a concept sketch of the piece. I do this to scale so it is a fairly accurate and proportional representation of the finished piece. Drawing to scale also makes it a lot easier when you go to resize the sketch to the full scale.
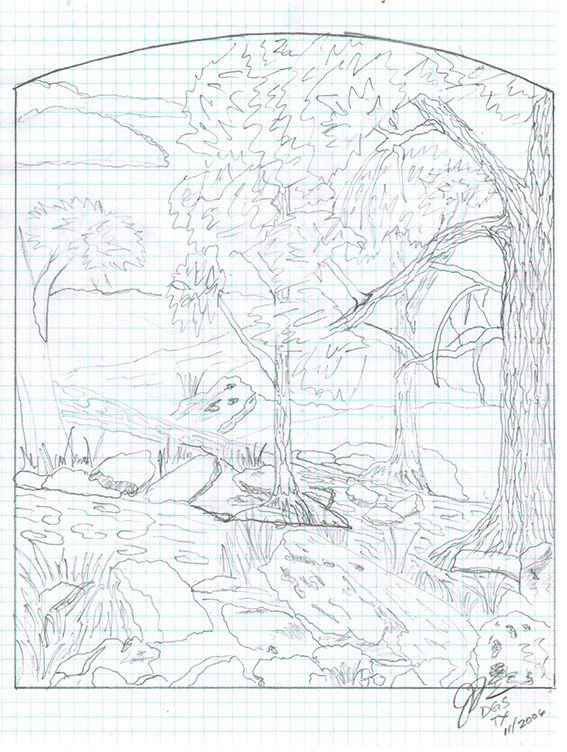
Concept Sketch to scale
Next you blow up the sketch to make a full scale rendering of the design. The glass is covered in a resist tape. For surface etching this resist is fairly light and thin, not much more than a large roll of masking tape. For carved pieces you need a heavier resist. on this particular piece I used 8 mil vinyl. The resist withstands the pressure of the sand being shot at it under pressure. The full scale design is then attached to the vinyl resist. Spray glue was a wonderful invention.
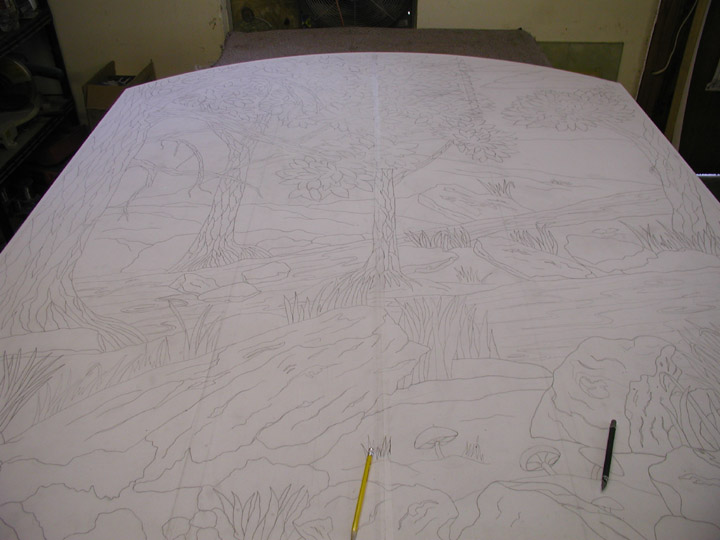
Full scale design attached to the vinyl.
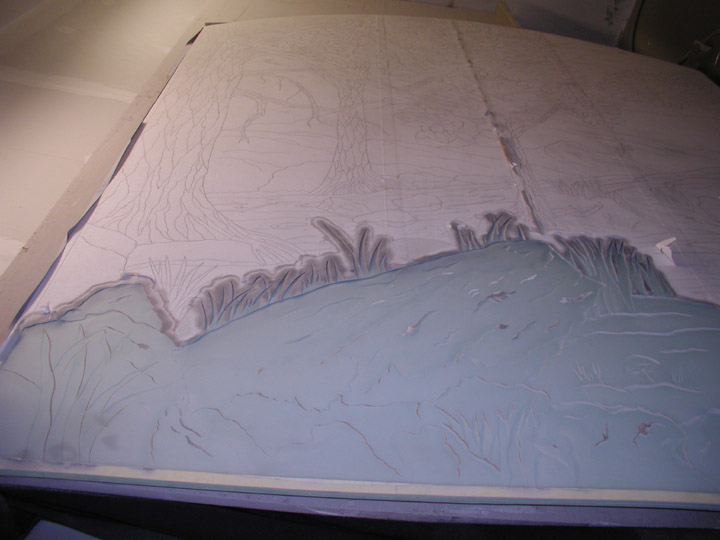
Next each line is cut with a sharp blade through the design and vinyl down to the glass. The glass is then put into the sandblasting booth and the first layers are peeled away exposing the glass underneath. Much thought must be put into which layers to blast first because it affects what appears closest. Choosing the wrong layer can really throw off the look of the finished piece. Below are pictures of this panel at various stages of the carving.

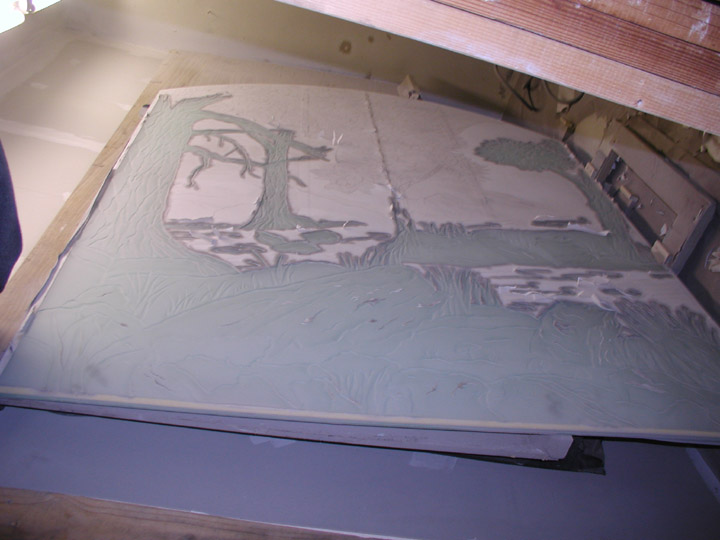
The last areas to be sandblasted are the light frost and shading areas of the design. After that the rest of the vinyl (assuming there are some clear areas left) is removed and the piece is ready to be cleaned and installed..
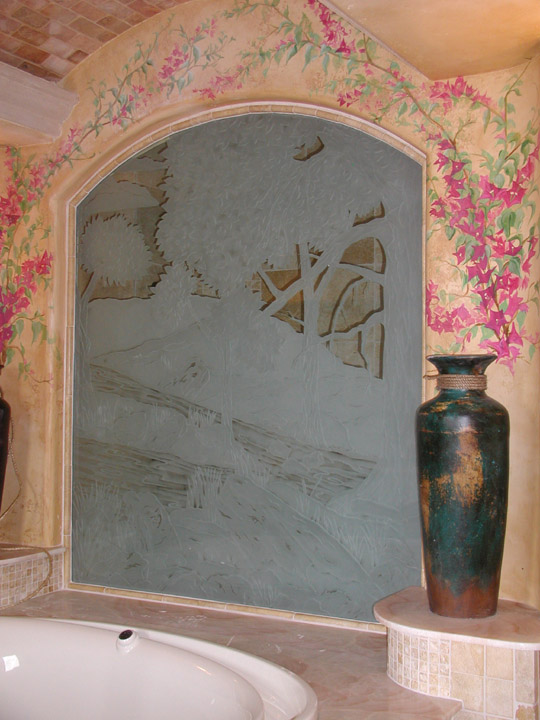
Here are some pictures of this piece completed.
| Home | Stained Glass Windows | Beveled Windows | Etchings and Carvings |
| Fused and Bent Glass | Mosaics | Lamps | Ordering Custom Work |
| Religious Works | Restoration and Protective Glazing | Great Links | Resume |
| Special Events and Info | Like us on
|
Follow us on |
Connect with us on |